Quick start
The view for editing a project ...
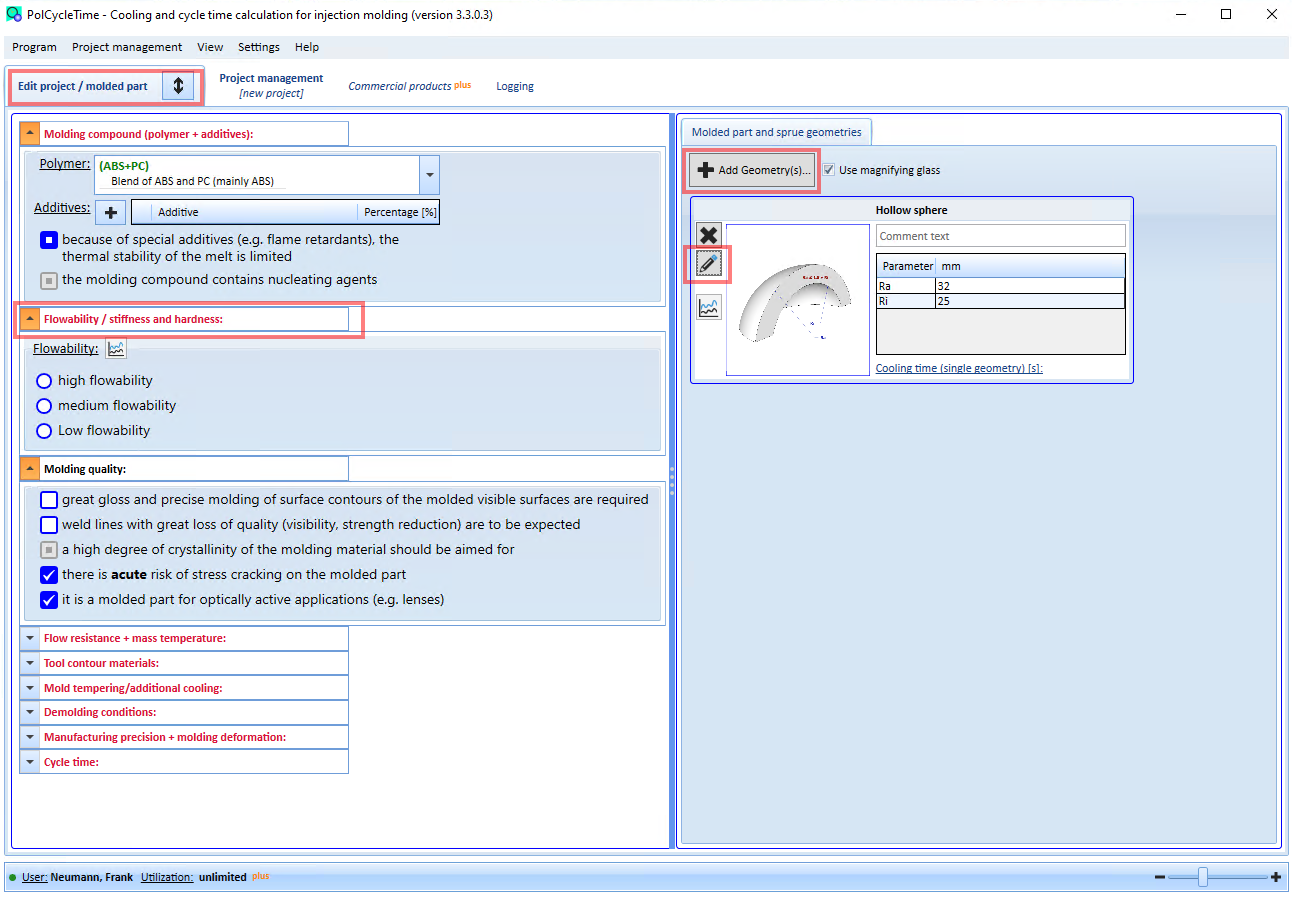
The following sequence is only a suggestion. The order of your inputs/decisions is of secondary importance only. Results are displayed or updated immediately when all required inputs and decisions are available.
- Enter all your inputs and decisions that affect the cooling and cycle time. The inputs and decisions are grouped into individual groups. The heading of the group is red if there are still entries missing within the group.
- Add the relevant molding and sprue geometries (in the right part of the view)
- Switch to the "Molded part and sprue geometries" tab
- Click the [Add geometry(s)] button. Another window will open.
- Select the geometry(s) by double-clicking on each one. The selected geometry is added to the corresponding list in the background.
- Close the geometry selection window.
- Edit the geometry data.
- To do this, click on the button with the pencil symbol (to the left of the corresponding geometry). Another window will open.
- Enter the geometry data and confirm your entries with the [Enter] key.
- The window will then close.
- As far as all inputs are available, the results (top right) are displayed. If necessary, you can now correct or specify your entries and decisions later.
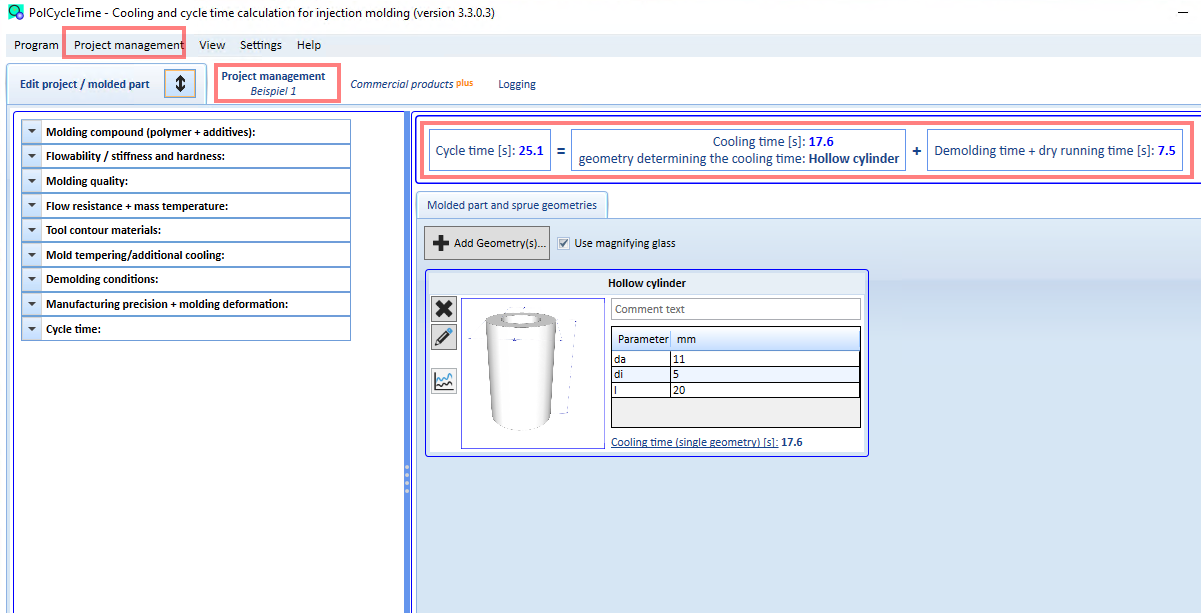
- Finally, switch to the "Project management" tab and save your entries and decisions as a project file. We recommend that you create a corresponding project file for each mold part or mold part-tool-machine combination.
All project information is displayed in a print preview and can be printed out (menu or "Project management" tab).