Add/edit geometries
The operation does not enforce a predefined sequence. Whether you enter all geometries first and then all other project inputs or vice versa is irrelevant. This is one of the reasons why editing is possible at any time and the results are updated immediately.
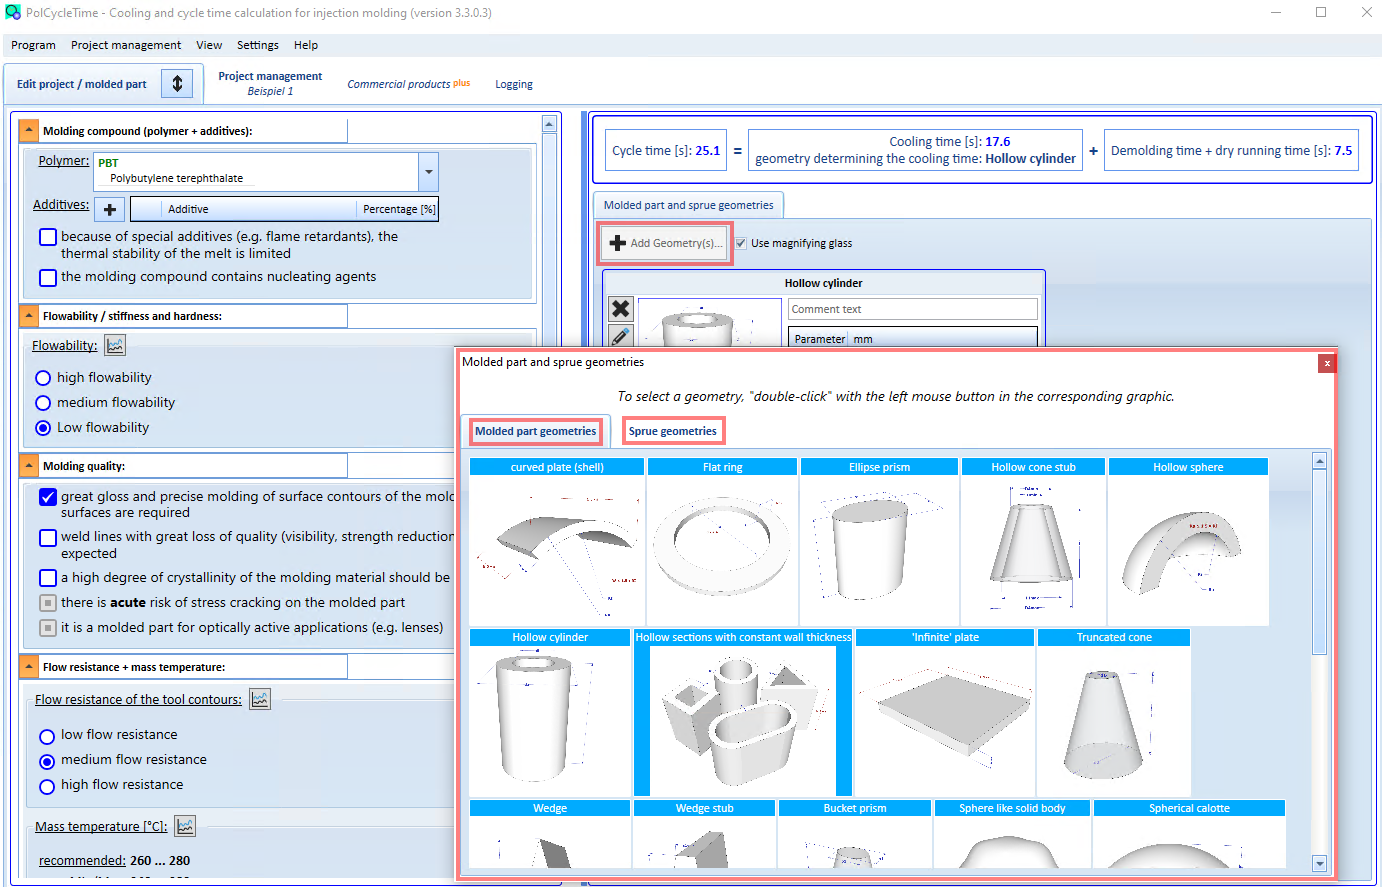
- You analyze individual parts of the molded part to determine whether they can be decisive for the cooling time of the molded part.
- To do this, mentally divide your part into sub-geometries and analyze them individually.
- Click the [Add geometry(s)] button in the main view. Then another window opens. You can change the size and position of this window as you like.
- Within the new window you will see two tabs "Molded part geometries" and "Sprue geometries".
- Now select one or more geometries. Simply double-click on the corresponding graphic. These geometries are then immediately transferred to the list in the main view.
- Close the window when you have added all the part geometries.
Now edit the dimensions of the added geometries
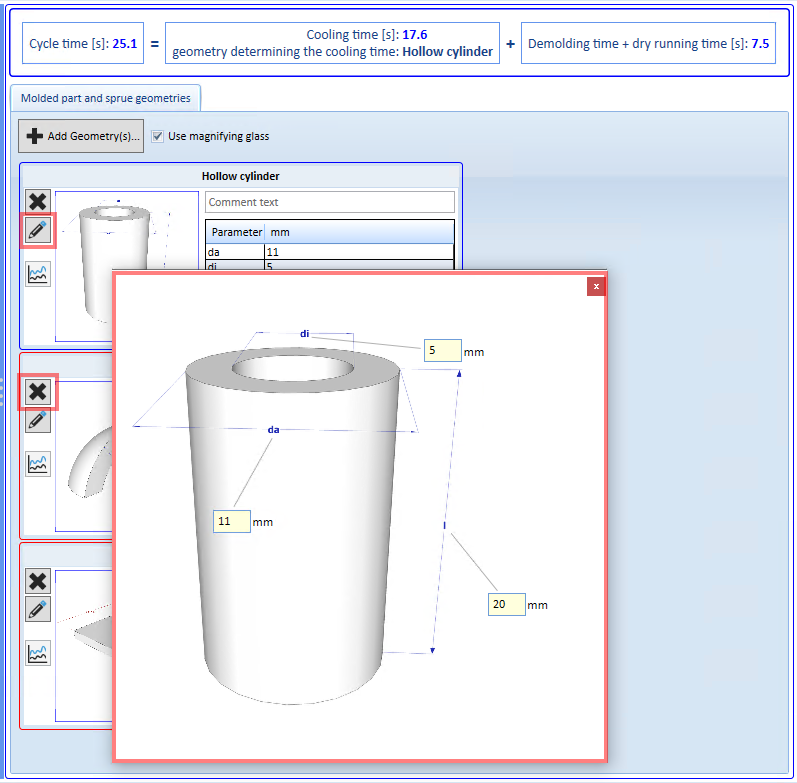
- Click on the corresponding pencil icon (to the left of the geometry). Another window will open.
- now enter all dimensions
- use the Enter key to complete the inputs. The window will be closed.
If all other project data are available, the cooling time per geometry and the determining cooling time of the molded part will be displayed immediately.
To remove a geometry from the list of the main view, click on the button with the X icon.